Setting Up Your Worm Bin: A Simple Step-by-Step Guide to Vermicomposting

Here is the image of a basic worm bin setup. It shows a container filled with bedding material like shredded newspaper or cardboard, populated with red wiggler worms, and includes typical food scraps such as fruit peels and vegetable cuttings. The bin is partially open, displaying its contents and highlighting the suitable environment for worm composting. This image conveys a simple, home-based vermicomposting system, demonstrating an eco-friendly and sustainable way to recycle organic kitchen waste.

Vermicomposting, or worm composting, is an incredibly efficient way to convert kitchen scraps and other organic waste into nutrient-rich compost. It’s simple, environmentally friendly, and a great way to reduce your carbon footprint. Here鈥檚 a guide to help you set up your very own worm bin.

Step 1: Choosing the Right Bin

Here is an image showcasing different types of worm bins, ranging from homemade to commercially available options. The image includes a variety of worm bin designs such as DIY plastic bins, wooden boxes, and professionally manufactured worm composters. Each bin is distinct, demonstrating the various methods and materials used for worm composting. This illustration highlights the versatility and range of options available for individuals interested in starting their own vermicomposting setup, catering to different preferences and needs.

Start by selecting an appropriate container for your worm bin. You can either buy a pre-made worm bin or make one yourself using a plastic bin. The size of the bin depends on the amount of food waste you generate. A good rule of thumb is 1 square foot of surface area for every pound of waste per week.

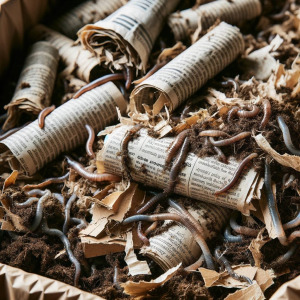
Step 2: Preparing the Bedding

Here is an image showing moistened bedding materials like shredded newspaper and cardboard in a worm bin. The bedding is depicted as damp and loosely packed, creating an ideal environment for the worms. The focus is on the texture and composition of the bedding, with visible layers of shredded newspaper and cardboard pieces. This visual conveys the preparation stage of a worm bin, emphasizing the importance of proper bedding for the health and efficiency of the composting worms.

Worms need moist bedding to live in. Shredded newspaper, cardboard, or coconut coir make excellent bedding materials. Moisten the bedding so that it’s damp but not soggy, and fill the bin with it.

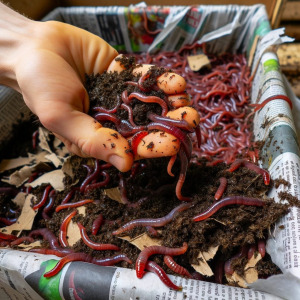
Step 3: Adding Worms

Here is an image depicting red wiggler worms being added to a worm bin. The image shows a person's hand gently placing the worms onto the moistened bedding materials of shredded newspaper and cardboard. The red wigglers are clearly visible, showcasing their distinct color and size as they are introduced to their new environment. This visual captures the moment of introducing the worms to the bin, emphasizing the care and precision involved in setting up a successful vermicomposting system.

Red wigglers are the most commonly used worms for composting. You can purchase them online or from a local supplier. The number of worms you need will depend on the size of your bin and the amount of waste you produce. Generally, a pound of worms (about 1,000 worms) is sufficient for a standard-sized bin.

Step 4: Feeding Your Worms

Here is an image of a worm bin being fed with kitchen scraps. The image shows a variety of kitchen waste, including fruit peels, coffee grounds, and eggshells, being added to the bin. These scraps are placed on top of the existing bedding material, illustrating the feeding process in vermicomposting. The visual captures the mix of food scraps as they are introduced to the bin, highlighting the importance of feeding the worms a balanced mix of organic waste for efficient composting.

Worms eat fruit and vegetable scraps, coffee grounds, tea bags, eggshells, and more. Avoid feeding them meat, dairy, or oily foods. Feed your worms a small amount at first to prevent overfeeding. As the worms multiply and become more efficient, you can increase the amount of food.

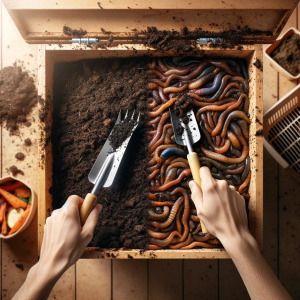
Step 5: Maintaining the Bin

Here is an image showing the process of harvesting worm castings from one side of a worm bin. The bin is open, displaying one side filled with dark, rich worm castings, and the other side with fresh bedding and food scraps. The image includes a person or a tool, such as a small shovel or rake, gently scooping out the castings. This visual effectively captures the essence of the harvesting process in vermicomposting, demonstrating how to separate the castings from the rest of the bin contents without disturbing the worms too much.

Keep the bin in a cool, dark place and maintain the moisture level of the bedding. Harvest the compost, also known as worm castings, every few months. To do this, move the compost to one side of the bin, and add new bedding and food to the other side. The worms will migrate to the new food source, making it easier to remove the compost.

Step 6: Using Your Compost

Here is an image of using worm compost in a garden. The scene showcases the application of rich, dark worm castings to the soil around healthy plants. It depicts a lush garden with a variety of plants, flowers, or vegetables, highlighting the enriched soil structure due to the addition of worm compost. The image shows a gardener's hands spreading the compost around the bases of the plants, illustrating the benefits of using this natural, nutrient-rich soil amendment for enhancing plant growth and soil health.

Worm compost is a fantastic soil amendment. Use it in your garden, potted plants, or as a top dressing for your lawn. It鈥檚 rich in nutrients and helps improve soil structure and moisture retention.

Setting up and maintaining a worm bin is a fulfilling project that benefits both your garden and the environment. Happy vermicomposting!

Shopping Cart
Scroll to Top